Ledger
This wallet supports both Core and eSpace
Introduction
You can now use your Ledger Nano S+, Nano X, Stax, or Flex hardware wallet to securely store your assets on both Core and eSpace. In this guide, we will show you how to interact with Conflux using your Ledger device and how to transfer assets.
Using Ledger on Core Space
For Ledger Nano S users: You'll need to manually set up the development environment and load the app. Please refer to the detailed instructions.
Before You Start
Before you start, make sure that you have done the following:
-
Updated your Ledger device to the latest firmware version
-
Installed Ledger Wallet and updated it to the latest version
-
Installed Fluent Wallet version 2.8.0 or later on Chrome or Edge browser (Firefox is not supported)
If you encounter any issues, find us on Discord or Telegram, we are happy to help.
For detailed usage instructions, you can refer to the official documentation.
Installation
You can install the Conflux app on your Ledger device by following these steps:
1. Connect your Ledger device to your computer through USB.
2. Unlock your device by entering your PIN.
3. Open Ledger Wallet.
4. In the menu on the left, click "Manager" to open the Ledger Wallet app manager.
5. When your Ledger device displays "Allow Ledger manager", press both buttons to continue.
6. Back in Ledger Wallet, under the "App catalog" tab, enter "Conflux" in the search field.
7. Once Ledger Wallet shows the Conflux app, press "Install".
The Conflux app is now installed successfully.

Connecting Your Ledger Device to Fluent
You can import accounts from your Ledger device into your Fluent wallet by following these steps:
1. Quit Ledger Wallet if it is currently opened.
2. Connect your Ledger device to your computer through USB.
3. Unlock your device by entering your PIN.
4. Navigate to the Conflux app on your device and press both buttons to open it.
5. In Fluent, open the menu in the top right corner and select "Account Management".
6. Click "Add" and select "Hardware Wallet". Read the instructions carefully and click "Ready".
7. On the "Connect your Ledger" page, click "Connect".
8. A browser popup will appear saying "Fluent wants to connect". Select your Ledger device from the list and click "Connect".
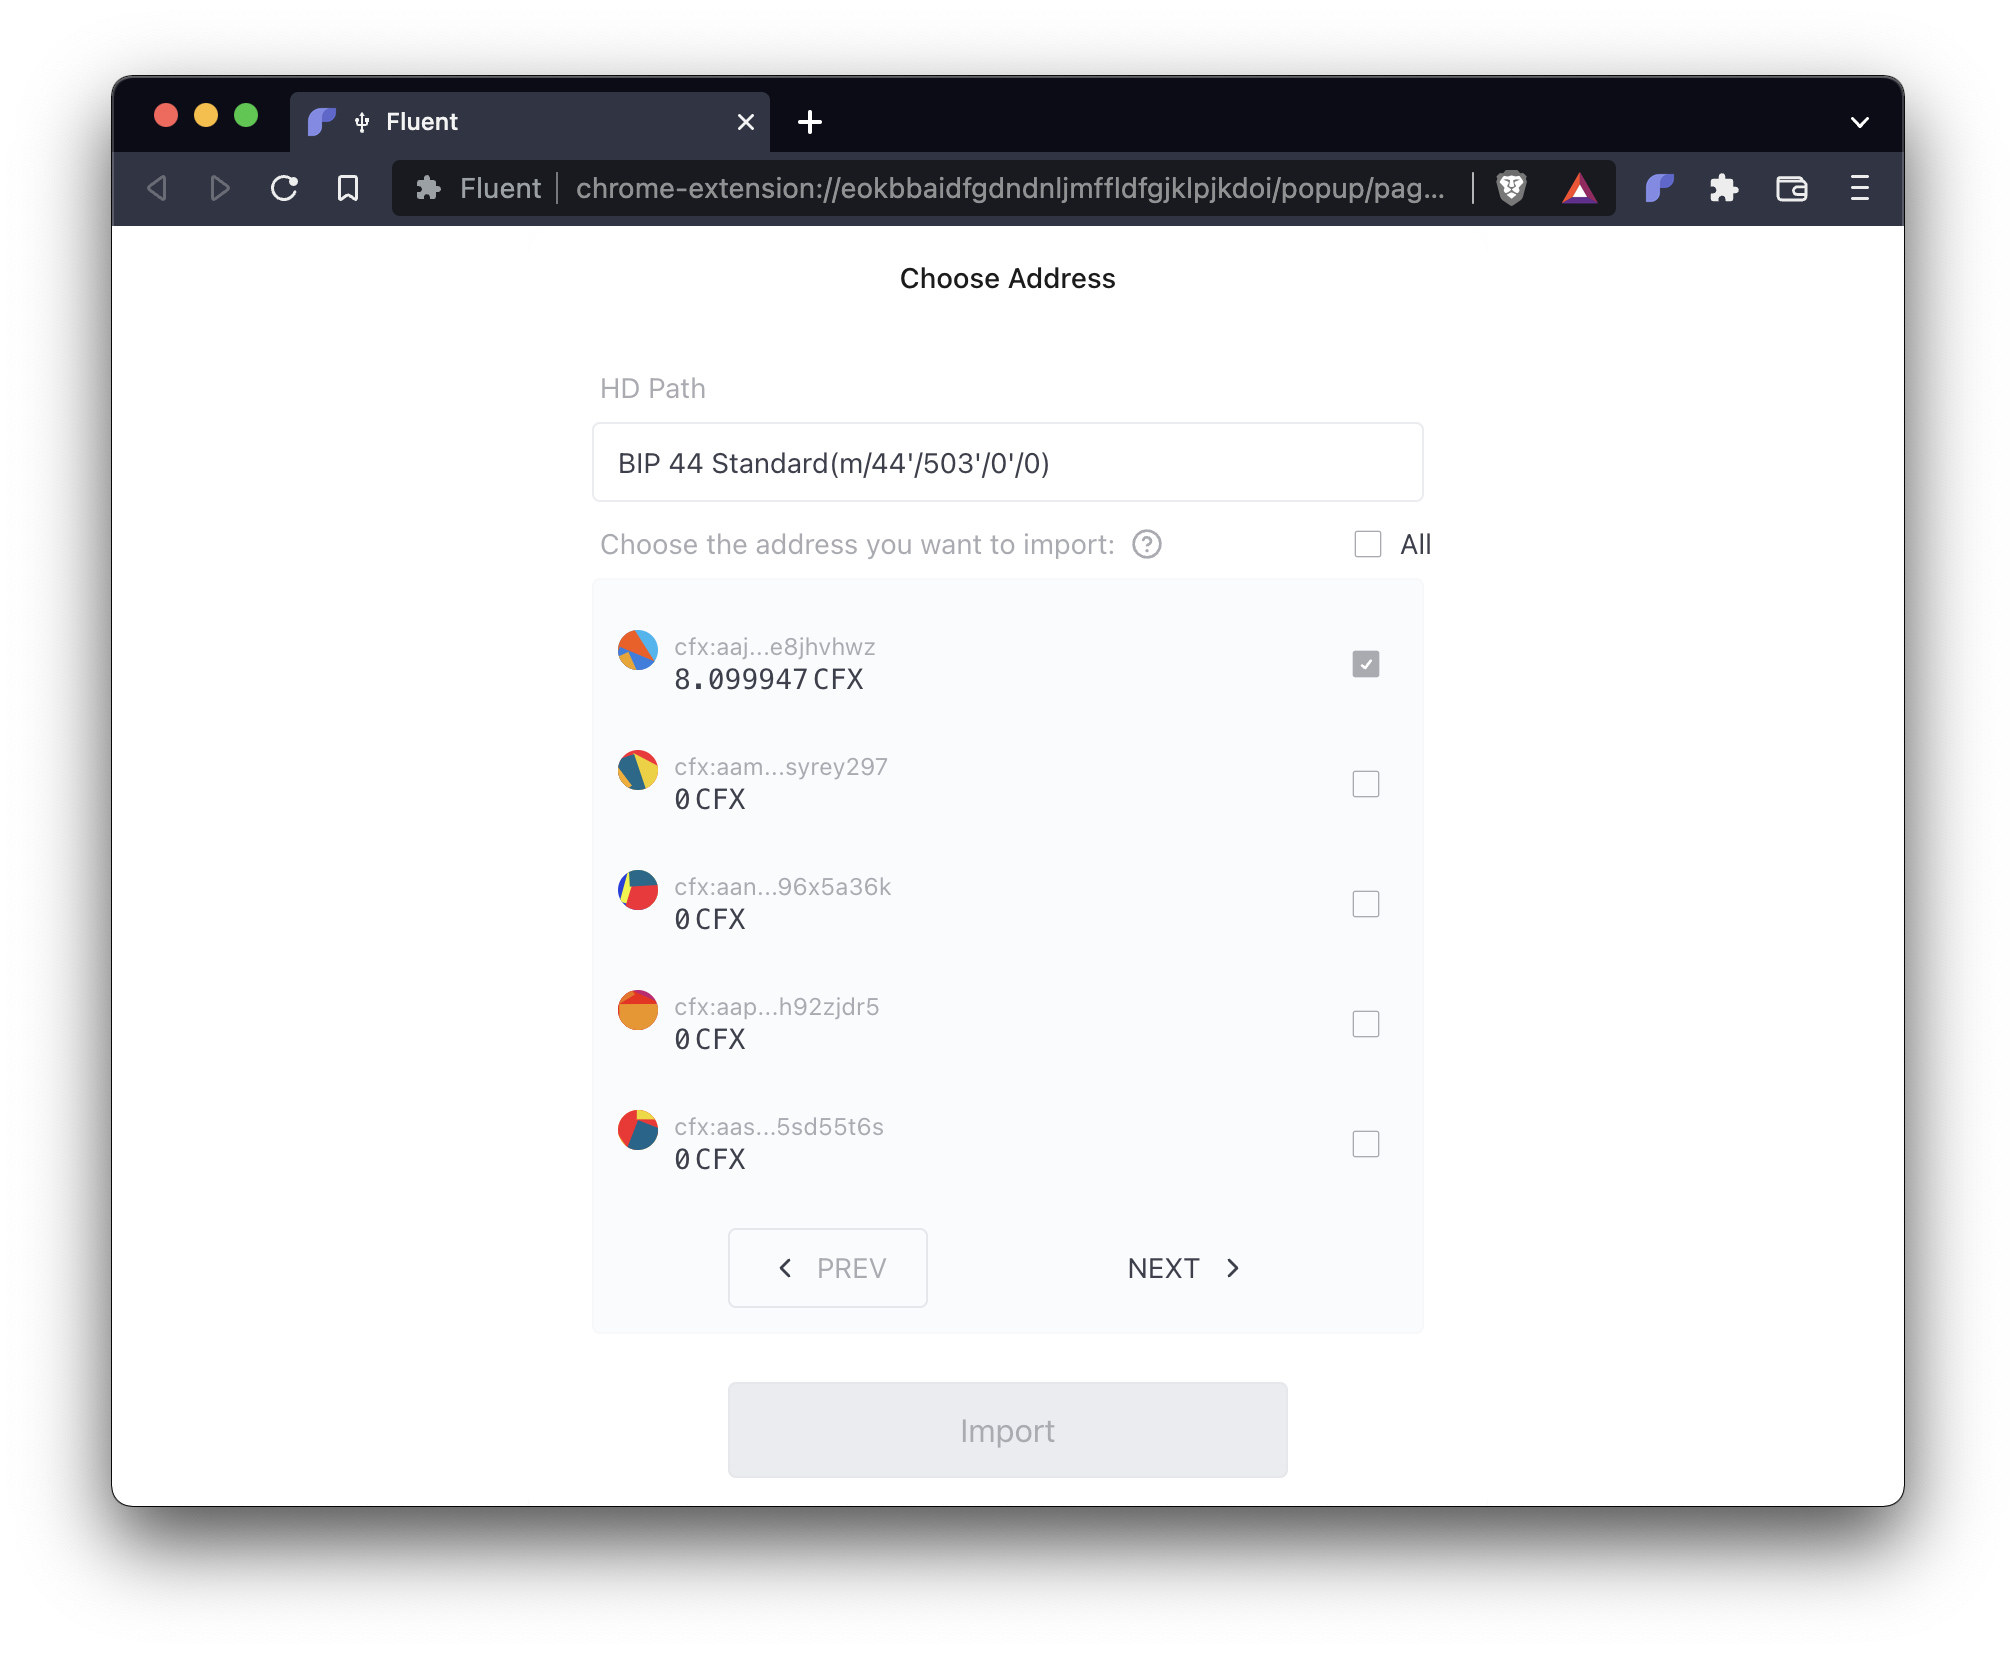
9. After a few seconds, the "Choose Address" page shows up in Fluent. Select one or more accounts that you would like to import to Fluent and click "Import".
Your account is now available in Fluent as "LedgerNanoS-1" (or similar).
Using Ledger: Sending Crypto Assets
Assuming your account on the Ledger device has some CFX tokens, the steps below show how to make a CFX transfer on Conflux.
If you do not have CFX, you can purchase at one of the exchanges listed here.
Make sure you have already imported your Ledger account into your Fluent wallet by following the steps in the previous section. Quit Ledger Wallet if it is currently opened.
1. Connect your Ledger device to your computer through USB.
2. Unlock your device by entering your PIN.
3. Navigate to the Conflux app on your device and press both buttons to open it.
4. In Fluent, select your Ledger account (e.g., "LedgerNanoS-1").
5. Click "Send" and enter the recipient address.
6. Under "Token and Amount", enter the amount of CFX to transfer and click "Next".
7. Double check the transaction details, and click "Confirm".
8. Your Ledger device will now show "Review transaction". Carefully review the transaction amount and recipient address by repeatedly pressing the right button on your device.
9. If everything looks correct, press both buttons at the "Accept and send" screen to approve the transaction. Otherwise, press both buttons at the "Reject" screen to reject the transaction.
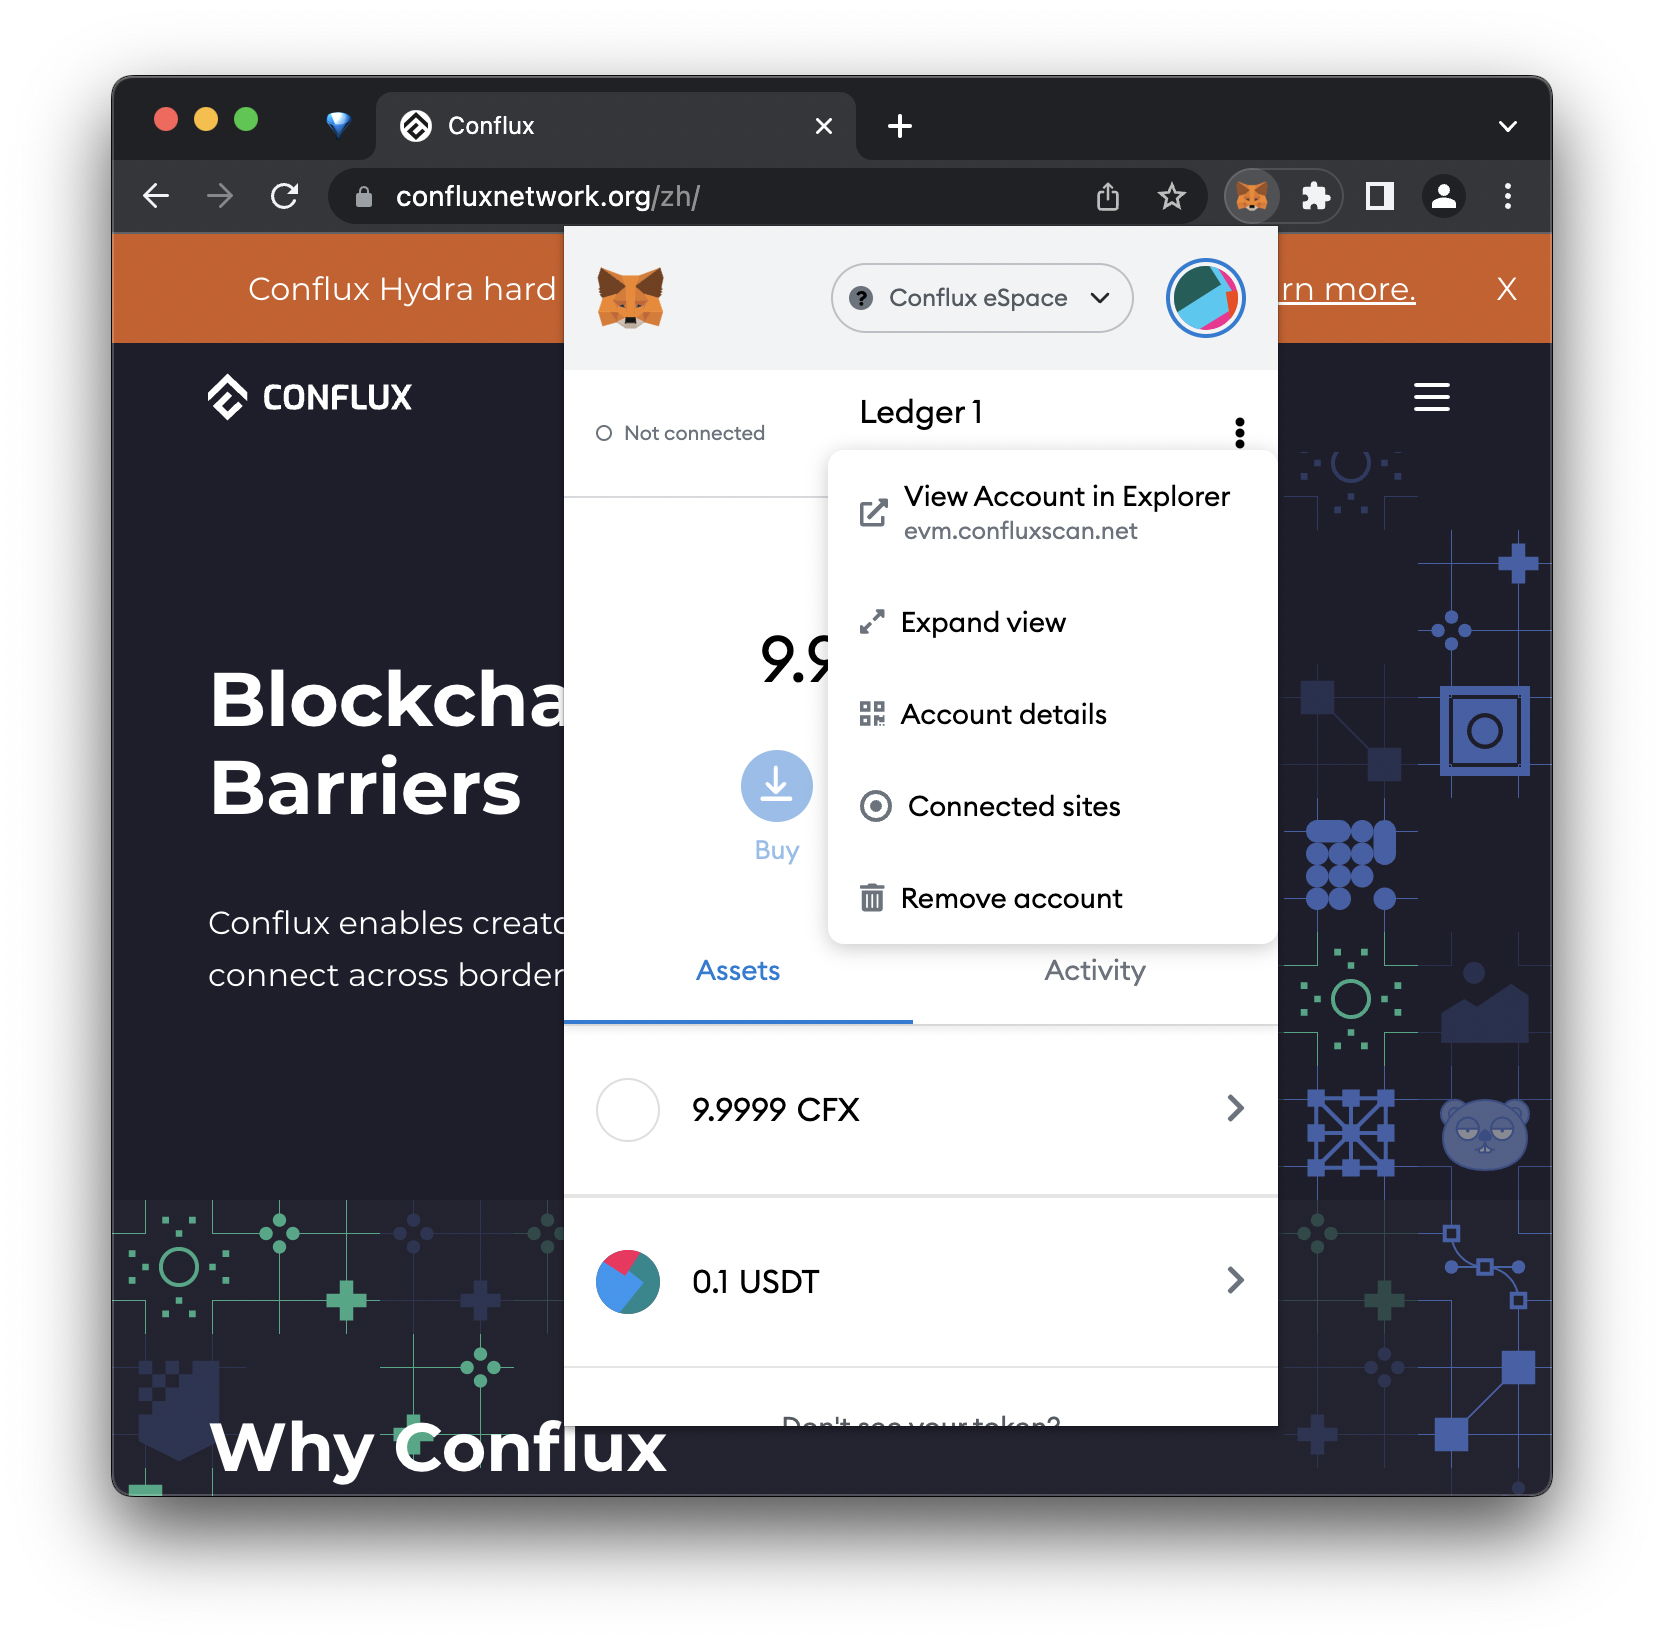
After the transaction has been approved, it is now signed and sent to the Conflux Network. You can see the transaction status in Fluent. If you click on "History", then click on the arrow icon at the top right corner of your transaction, you can see more details on Conflux Scan.

Next Steps
You can learn more about Conflux at confluxnetwork.org. You can check transaction and account details on Conflux Scan.
If you encounter any issues, find us on Discord or Telegram, we are happy to help.
Using Ledger on eSpace
For Conflux eSpace, you should use The Ledger Ethereum app.
Before You Start
Before you start, make sure that you have done the following:
- Updated your Ledger device (Nano S+, Nano X, Stax, or Flex) to the latest firmware version
- Installed Ledger Wallet and updated it to the latest version
- Installed MetaMask on Chrome or Edge browser (Firefox is not supported)
If you encounter any issues, find us on Discord or Telegram, we are happy to help.
Installation
You can install the Ethereum app on your Ledger device by following these steps:
- Connect your Ledger device to your computer through USB.
- Unlock your device by entering your PIN.
- Open Ledger Wallet.
- In the menu on the left, click "Manager" to open the Ledger Wallet app manager.
- When your Ledger device displays "Allow Ledger manager", press both buttons to continue.
- Back in Ledger Wallet, under the "App catalog" tab, enter "Ethereum" in the search field.
- Once Ledger Wallet shows the Ethereum app, press "Install".
- The Ethereum app is now installed successfully.
Setting up MetaMask
Connecting Your MetaMask Wallet to Conflux eSpace
You can add the Conflux eSpace network to your MetaMask wallet by following these steps:
- Open your browser and navigate to https://evmchainlist.org.
- Search for "Conflux eSpace".
- Click "Connect Wallet" to allow this site to send requests to MetaMask.
- Click "Add to MetaMask" under "Conflux eSpace".
- When MetaMask prompts "Allow this site to add a network?", click "Approve".
- When MetaMask prompts "Allow this site to switch the network?", click "Approve".
Your MetaMask wallet is now connected to Conflux eSpace. You can switch to other networks anytime through the network selection dropdown menu in MetaMask.
Alternatively, you can add Conflux eSpace to MetaMask manually under "Settings", "Networks", "Add Network":
- Network Name: Conflux eSpace
- New RPC URL: https://evm.confluxrpc.com
- Chain ID: 1030
- Currency Symbol: CFX
- Block Explorer URL: https://evm.confluxscan.org
Connecting Your Ledger Device to MetaMask
You can import accounts from your Ledger device into your MetaMask wallet by following these steps:
- Quit Ledger Wallet if it is currently opened.
- Connect your Ledger device to your computer through USB.
- Unlock your device by entering your PIN.
- Navigate to the Ethereum app on your device and press both buttons to open it.
- In MetaMask, navigate to "Account", "Add Wallet" and "Add a hardware wallet".
- Select "Ledger" and click "Continue".
- A browser popup will appear saying "MetaMask wants to connect to a HID device". Select your Ledger device from the list and click "Connect".
- After a few seconds, the "Select an Account" page shows up in MetaMask. Select one or more accounts that you would like to import to MetaMask and click "Unlock".
- Your account is now visible in MetaMask as "Ledger 1".
Using Ledger
Sending Crypto Assets
Assuming your account on the Ledger device has some CFX tokens, the steps below show how to make a CFX transfer on Conflux eSpace.
Note: If you do not have CFX, you can purchase at one of the exchanges listed here.
- Make sure you have already imported your Ledger account into your MetaMask wallet by following the steps in the previous section. Quit Ledger Wallet if it is currently opened.
- Connect your Ledger device to your computer through USB.
- Unlock your device by entering your PIN.
- Navigate to the Ethereum app on your device and press both buttons to open it.
- In MetaMask, select your Ledger account (e.g., "Ledger 1").
- Click "Send" and enter the recipient address (should start with
0x). - Under "Amount", enter the amount of CFX to transfer and click "Next".
- Double check the transaction details, and click "Confirm".
- Your Ledger device will now show "Review transaction". Carefully review the transaction amount and recipient address by repeatedly pressing the right button on your device.
- If everything looks correct, press both buttons at the "Accept and send" screen to approve the transaction. Otherwise, press both buttons at the "Reject" screen to reject the transaction.
- After the transaction has been approved, it is now signed and sent to the Conflux Network. You can see the transaction status in MetaMask. If you click on the transaction and click "View on block explorer", you can see more details on Conflux Scan.
Receiving Crypto Assets
In order to receive CFX and ERC20 tokens to your Ledger wallet account, simply copy your address from MetaMask and share it with the sender. You only need to sign transactions using your Ledger device when sending funds, not when receiving them. MetaMask can also provide you with an easy-to-use QR code under "Account details".
Obtaining CFX
There are multiple ways of obtaining CFX and other tokens on Conflux eSpace.
- You can obtain CFX and withdraw it to Conflux eSpace through a variety of centralized exchanges (e.g., KuCoin).
- You can also use a decentralized exchange like Swappi.
- Finally, you can also transfer crypto assets from other chains to Conflux eSpace through cross-chain apps like Multichain, meson.fi, cBridge, or the Conflux eSpace Bridge.
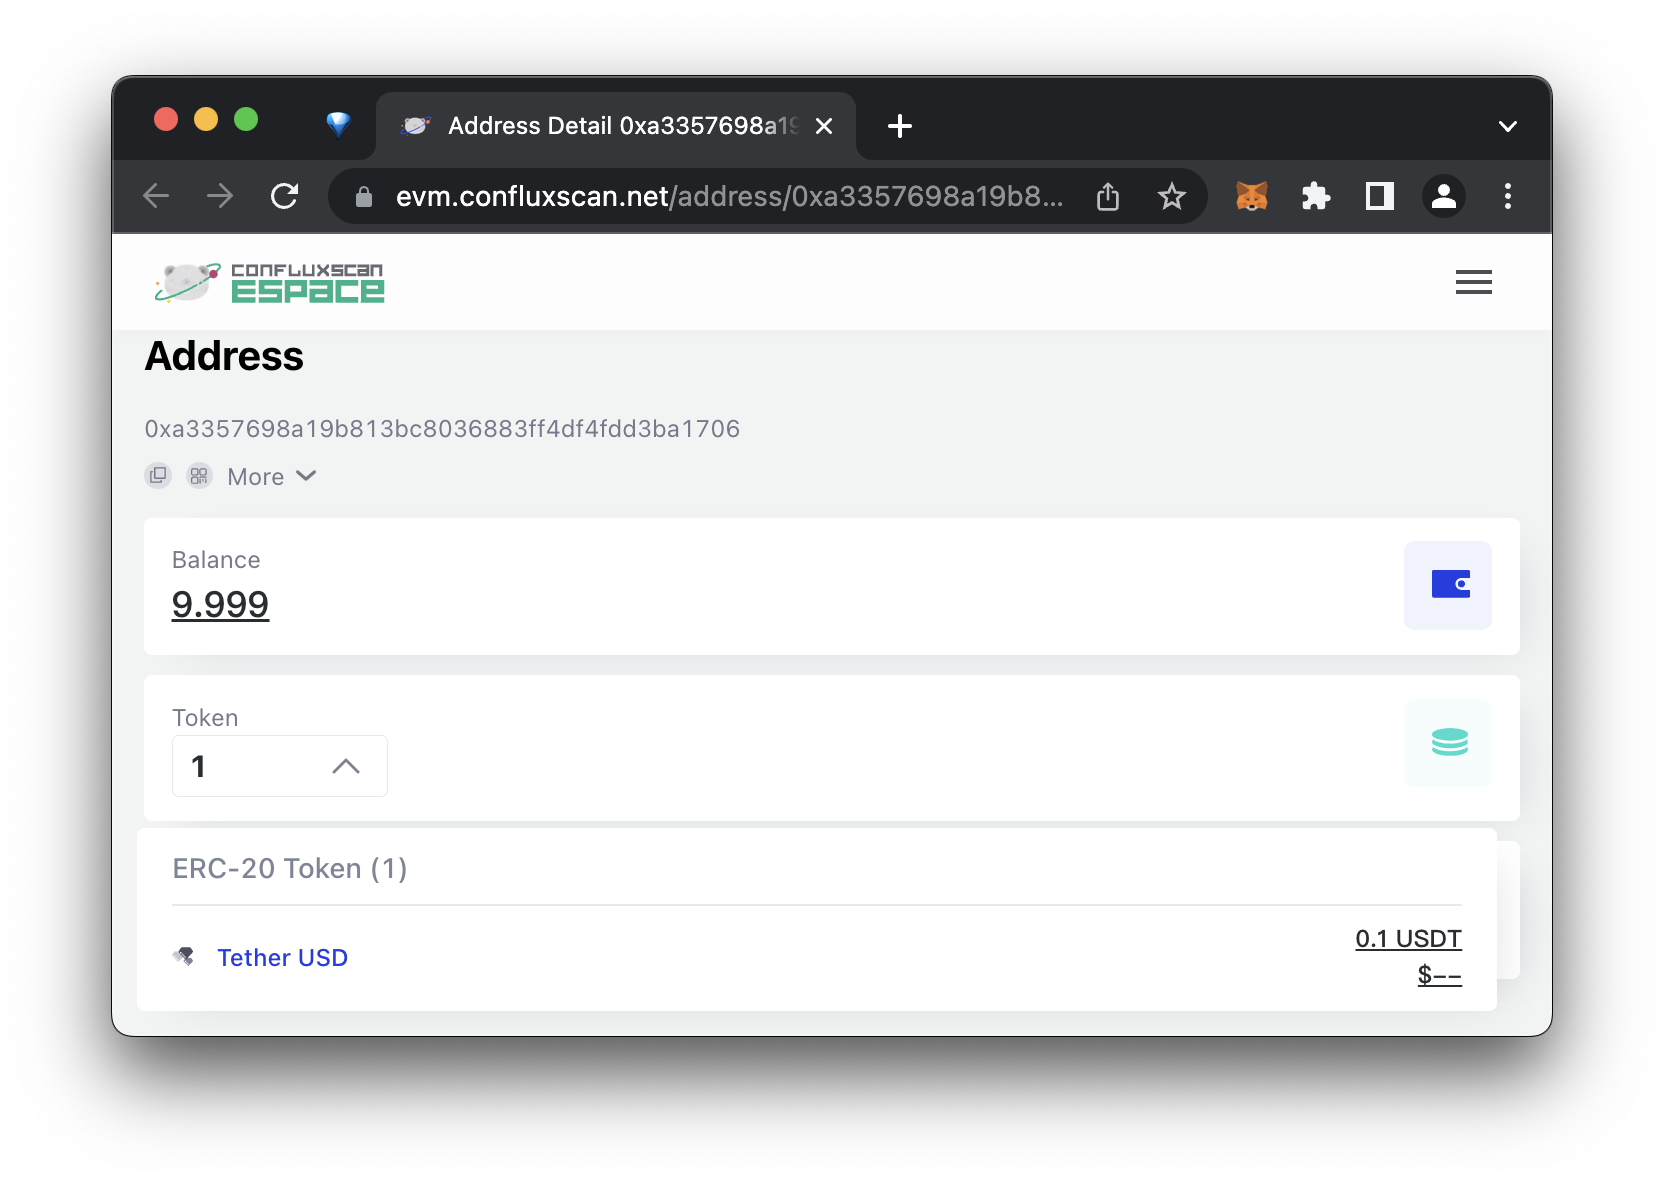
Checking Your Balance
The easiest way to check your CFX and ERC20 token balances held by your Ledger account is to simply view them in MetaMask.
Alternatively, you can click on "View Account in Explorer", or navigate to https://evm.confluxscan.org and manually search for your address to see your token balances and transaction history.